- Dùng lệnh : wall
Kết quả:
- Bạn cũng có thể check có bao nhiêu user đang login vào trong system bằng lệnh:
# who
Thứ Sáu, 24 tháng 4, 2020
Chủ Nhật, 19 tháng 4, 2020
Cách git clone từ ssh | git clone ssh://git@github.com//.git
Để git source code thông qua ssh:
fatal: destination path 'ssh://user@server:/GitRepos/myproject.git' already exists and is not an empty directory.
Fix:
git clone ssh://git@github.com/<user>/<repository name>.gitfatal: destination path 'ssh://user@server:/GitRepos/myproject.git' already exists and is not an empty directory.
Fix:
For setting up git to clone via ssh see:
- Generating SSH Keys and add your generated key in Account Settings -> SSH Keys
1. Kiểm tra xem git đã có ssh key chưa:
$ ls -al ~/.ssh
# Lists the files in your .ssh directory, if they exist
Nếu có thì nó sẽ có file .pub như sau:
- id_rsa.pub
- id_ecdsa.pub
- id_ed25519.pub
2. Nếu chưa có ssh key thì phải add
$ ssh-keygen -t rsa -b 4096 -C "your_email@example.com"
email: là email bạn đăng ký git
Tiếp:
Enter a file in which to save the key (/c/Users/you/.ssh/id_rsa):[Press enter]
Thêm mật khẩu:
Enter passphrase (empty for no passphrase): [Type a passphrase]
> Enter same passphrase again: [Type passphrase again]
3. Add ssh-key vào ssh-agent
$ eval $(ssh-agent -s)$ ssh-add ~/.ssh/id_rsaThứ Năm, 2 tháng 4, 2020
DAC with STM32 | Study STM32 with Standard Peripheral Library

@par Example Description
This example provides a short description of how to use the DAC peripheral to
generate several signals using DMA controller.
When the user presses the KEY push-button, DMA transfers the two selected
waveforms to the DAC.
For each press on KEY button, 2 signals has been selected and can be monitored on
the two DAC channels:
- Escalator waveform (Channel 1) and Sine waveForm (Channel 2).
- Noise waveform (Channel 1) and Triangle waveform (Channel 2).
@par Directory contents
- DAC/DAC_SignalsGeneration/stm32f4xx_conf.h Library Configuration file
- DAC/DAC_SignalsGeneration/stm32f4xx_it.c Interrupt handlers
- DAC/DAC_SignalsGeneration/stm32f4xx_it.h Interrupt handlers header file
- DAC/DAC_SignalsGeneration/main.c Main program
- DAC/DAC_SignalsGeneration/main.h Main program header file
- DAC/DAC_SignalsGeneration/system_stm32f4xx.c STM32F4xx system source file
1. main.c
/* Includes ------------------------------------------------------------------*/
#include "main.h"
DAC_InitTypeDef DAC_InitStructure;
const uint16_t aSine12bit[32] = {
2047, 2447, 2831, 3185, 3498, 3750, 3939, 4056, 4095, 4056,
3939, 3750, 3495, 3185, 2831, 2447, 2047, 1647, 1263, 909,
599, 344, 155, 38, 0, 38, 155, 344, 599, 909, 1263, 1647};
const uint8_t aEscalator8bit[6] = {0x0, 0x33, 0x66, 0x99, 0xCC, 0xFF};
__IO uint8_t ubSelectedWavesForm = 1;
__IO uint8_t ubKeyPressed = SET;
/* Private function prototypes -----------------------------------------------*/
static void TIM6_Config(void);
static void DAC_Ch1_EscalatorConfig(void);
static void DAC_Ch2_SineWaveConfig(void);
static void DAC_Ch1_NoiseConfig(void);
static void DAC_Ch2_TriangleConfig(void);
int main(void)
{
/*!< At this stage the microcontroller clock setting is already configured,
this is done through SystemInit() function which is called from startup
files (startup_stm32f40xx.s/startup_stm32f427x.s) before to branch to
application main.
To reconfigure the default setting of SystemInit() function, refer to
system_stm32f4xx.c file
*/
/* Preconfiguration before using DAC----------------------------------------*/
GPIO_InitTypeDef GPIO_InitStructure;
/* DMA1 clock enable */
RCC_AHB1PeriphClockCmd(RCC_AHB1Periph_DMA1, ENABLE);
/* GPIOA clock enable (to be used with DAC) */
RCC_AHB1PeriphClockCmd(RCC_AHB1Periph_GPIOA, ENABLE);
/* DAC Periph clock enable */
RCC_APB1PeriphClockCmd(RCC_APB1Periph_DAC, ENABLE);
/* DAC channel 1 & 2 (DAC_OUT1 = PA.4)(DAC_OUT2 = PA.5) configuration */
GPIO_InitStructure.GPIO_Pin = GPIO_Pin_4 | GPIO_Pin_5;
GPIO_InitStructure.GPIO_Mode = GPIO_Mode_AN;
GPIO_InitStructure.GPIO_PuPd = GPIO_PuPd_NOPULL;
GPIO_Init(GPIOA, &GPIO_InitStructure);
/* TIM6 Configuration ------------------------------------------------------*/
TIM6_Config();
/* Configures Key Button */
STM_EVAL_PBInit(BUTTON_KEY, BUTTON_MODE_EXTI);
while (1)
{
/* If the Key is pressed */
if (ubKeyPressed != RESET)
{
DAC_DeInit();
/* select waves forms according to the Key Button status */
if (ubSelectedWavesForm == 1)
{
/* The sine wave and the escalator wave has been selected */
/* Escalator Wave generator ------------------------------------------*/
DAC_Ch1_EscalatorConfig();
/* Sine Wave generator -----------------------------------------------*/
DAC_Ch2_SineWaveConfig();
}
else
{
/* The triangle wave and the noise wave has been selected */
/* Noise Wave generator ----------------------------------------------*/
DAC_Ch1_NoiseConfig();
/* Triangle Wave generator -------------------------------------------*/
DAC_Ch2_TriangleConfig();
}
ubKeyPressed = RESET;
}
}
}
/**
* @brief TIM6 Configuration
* @note TIM6 configuration is based on APB1 frequency
* @note TIM6 Update event occurs each TIM6CLK/256
* @param None
* @retval None
*/
static void TIM6_Config(void)
{
TIM_TimeBaseInitTypeDef TIM_TimeBaseStructure;
/* TIM6 Periph clock enable */
RCC_APB1PeriphClockCmd(RCC_APB1Periph_TIM6, ENABLE);
/* --------------------------------------------------------
TIM3 input clock (TIM6CLK) is set to 2 * APB1 clock (PCLK1),
since APB1 prescaler is different from 1.
TIM6CLK = 2 * PCLK1
TIM6CLK = HCLK / 2 = SystemCoreClock /2
TIM6 Update event occurs each TIM6CLK/256
Note:
SystemCoreClock variable holds HCLK frequency and is defined in system_stm32f4xx.c file.
Each time the core clock (HCLK) changes, user had to call SystemCoreClockUpdate()
function to update SystemCoreClock variable value. Otherwise, any configuration
based on this variable will be incorrect.
----------------------------------------------------------- */
/* Time base configuration */
TIM_TimeBaseStructInit(&TIM_TimeBaseStructure);
TIM_TimeBaseStructure.TIM_Period = 0xFF;
TIM_TimeBaseStructure.TIM_Prescaler = 0;
TIM_TimeBaseStructure.TIM_ClockDivision = 0;
TIM_TimeBaseStructure.TIM_CounterMode = TIM_CounterMode_Up;
TIM_TimeBaseInit(TIM6, &TIM_TimeBaseStructure);
/* TIM6 TRGO selection */
TIM_SelectOutputTrigger(TIM6, TIM_TRGOSource_Update);
/* TIM6 enable counter */
TIM_Cmd(TIM6, ENABLE);
}
/**
* @brief DAC Channel2 SineWave Configuration
* @param None
* @retval None
*/
static void DAC_Ch2_SineWaveConfig(void)
{
DMA_InitTypeDef DMA_InitStructure;
/* DAC channel2 Configuration */
DAC_InitStructure.DAC_Trigger = DAC_Trigger_T6_TRGO;
DAC_InitStructure.DAC_WaveGeneration = DAC_WaveGeneration_None;
DAC_InitStructure.DAC_OutputBuffer = DAC_OutputBuffer_Enable;
DAC_Init(DAC_Channel_2, &DAC_InitStructure);
/* DMA1_Stream6 channel7 configuration **************************************/
DMA_DeInit(DMA1_Stream6);
DMA_InitStructure.DMA_Channel = DMA_Channel_7;
DMA_InitStructure.DMA_PeripheralBaseAddr = (uint32_t)DAC_DHR12R2_ADDRESS;
DMA_InitStructure.DMA_Memory0BaseAddr = (uint32_t)&aSine12bit;
DMA_InitStructure.DMA_DIR = DMA_DIR_MemoryToPeripheral;
DMA_InitStructure.DMA_BufferSize = 32;
DMA_InitStructure.DMA_PeripheralInc = DMA_PeripheralInc_Disable;
DMA_InitStructure.DMA_MemoryInc = DMA_MemoryInc_Enable;
DMA_InitStructure.DMA_PeripheralDataSize = DMA_PeripheralDataSize_HalfWord;
DMA_InitStructure.DMA_MemoryDataSize = DMA_MemoryDataSize_HalfWord;
DMA_InitStructure.DMA_Mode = DMA_Mode_Circular;
DMA_InitStructure.DMA_Priority = DMA_Priority_High;
DMA_InitStructure.DMA_FIFOMode = DMA_FIFOMode_Disable;
DMA_InitStructure.DMA_FIFOThreshold = DMA_FIFOThreshold_HalfFull;
DMA_InitStructure.DMA_MemoryBurst = DMA_MemoryBurst_Single;
DMA_InitStructure.DMA_PeripheralBurst = DMA_PeripheralBurst_Single;
DMA_Init(DMA1_Stream6, &DMA_InitStructure);
/* Enable DMA1_Stream6 */
DMA_Cmd(DMA1_Stream6, ENABLE);
/* Enable DAC Channel2 */
DAC_Cmd(DAC_Channel_2, ENABLE);
/* Enable DMA for DAC Channel2 */
DAC_DMACmd(DAC_Channel_2, ENABLE);
}
/**
* @brief DAC Channel1 Escalator Configuration
* @param None
* @retval None
*/
static void DAC_Ch1_EscalatorConfig(void)
{
DMA_InitTypeDef DMA_InitStructure;
/* DAC channel1 Configuration */
DAC_InitStructure.DAC_Trigger = DAC_Trigger_T6_TRGO;
DAC_InitStructure.DAC_WaveGeneration = DAC_WaveGeneration_None;
DAC_InitStructure.DAC_OutputBuffer = DAC_OutputBuffer_Enable;
DAC_Init(DAC_Channel_1, &DAC_InitStructure);
/* DMA1_Stream5 channel7 configuration **************************************/
DMA_DeInit(DMA1_Stream5);
DMA_InitStructure.DMA_Channel = DMA_Channel_7;
DMA_InitStructure.DMA_PeripheralBaseAddr = DAC_DHR8R1_ADDRESS;
DMA_InitStructure.DMA_Memory0BaseAddr = (uint32_t)&aEscalator8bit;
DMA_InitStructure.DMA_BufferSize = 6;
DMA_InitStructure.DMA_PeripheralDataSize = DMA_PeripheralDataSize_Byte;
DMA_InitStructure.DMA_MemoryDataSize = DMA_MemoryDataSize_Byte;
DMA_InitStructure.DMA_DIR = DMA_DIR_MemoryToPeripheral;
DMA_InitStructure.DMA_PeripheralInc = DMA_PeripheralInc_Disable;
DMA_InitStructure.DMA_MemoryInc = DMA_MemoryInc_Enable;
DMA_InitStructure.DMA_Mode = DMA_Mode_Circular;
DMA_InitStructure.DMA_Priority = DMA_Priority_High;
DMA_InitStructure.DMA_FIFOMode = DMA_FIFOMode_Disable;
DMA_InitStructure.DMA_FIFOThreshold = DMA_FIFOThreshold_HalfFull;
DMA_InitStructure.DMA_MemoryBurst = DMA_MemoryBurst_Single;
DMA_InitStructure.DMA_PeripheralBurst = DMA_PeripheralBurst_Single;
DMA_Init(DMA1_Stream5, &DMA_InitStructure);
/* Enable DMA1_Stream5 */
DMA_Cmd(DMA1_Stream5, ENABLE);
/* Enable DAC Channel1 */
DAC_Cmd(DAC_Channel_1, ENABLE);
/* Enable DMA for DAC Channel1 */
DAC_DMACmd(DAC_Channel_1, ENABLE);
}
/**
* @brief DAC Channel2 Triangle Configuration
* @param None
* @retval None
*/
static void DAC_Ch2_TriangleConfig(void)
{
/* DAC channel2 Configuration */
DAC_InitStructure.DAC_Trigger = DAC_Trigger_T6_TRGO;
DAC_InitStructure.DAC_WaveGeneration = DAC_WaveGeneration_Triangle;
DAC_InitStructure.DAC_LFSRUnmask_TriangleAmplitude = DAC_TriangleAmplitude_1023;
DAC_InitStructure.DAC_OutputBuffer = DAC_OutputBuffer_Enable;
DAC_Init(DAC_Channel_2, &DAC_InitStructure);
/* Enable DAC Channel2 */
DAC_Cmd(DAC_Channel_2, ENABLE);
/* Set DAC channel2 DHR12RD register */
DAC_SetChannel2Data(DAC_Align_12b_R, 0x100);
}
/**
* @brief DAC Channel1 Noise Configuration
* @param None
* @retval None
*/
static void DAC_Ch1_NoiseConfig(void)
{
/* DAC channel1 Configuration */
DAC_InitStructure.DAC_Trigger = DAC_Trigger_T6_TRGO;
DAC_InitStructure.DAC_WaveGeneration = DAC_WaveGeneration_Noise;
DAC_InitStructure.DAC_LFSRUnmask_TriangleAmplitude = DAC_LFSRUnmask_Bits10_0;
DAC_InitStructure.DAC_OutputBuffer = DAC_OutputBuffer_Enable;
DAC_Init(DAC_Channel_1, &DAC_InitStructure);
/* Enable DAC Channel1 */
DAC_Cmd(DAC_Channel_1, ENABLE);
/* Set DAC Channel1 DHR12L register */
DAC_SetChannel1Data(DAC_Align_12b_L, 0x7FF0);
}
#ifdef USE_FULL_ASSERT
/**
* @brief Reports the name of the source file and the source line number
* where the assert_param error has occurred.
* @param file: pointer to the source file name
* @param line: assert_param error line source number
* @retval None
*/
void assert_failed(uint8_t* file, uint32_t line)
{
/* User can add his own implementation to report the file name and line number,
ex: printf("Wrong parameters value: file %s on line %d\r\n", file, line) */
/* Infinite loop */
while (1)
{
}
}
#endif
Thứ Ba, 31 tháng 3, 2020
Nén và giải nén trong linux: zip, tar.gz và tar.bz2
Trong hệ thống *nix tồn tại một số dạng nén cơ bản như: zip, tar.gz và tar.bz2. Dưới đây là một vài ví dụ về cách nén và giải nén với những định dạng đó.
1. Nén và giải nén file có đuôi .gz
1.1 Nén
#gzip [tên file]
#gzip [tên file]
1.2 Giải nén
#gunzip [tên file]
#gunzip [tên file]
2. Gom và bung tập tin hoặc thư mục đuôi .tar
2.1 Gom
#tar -cvf [tênfile.tar] [file1] [file2] …
#tar -cvf [tênfile.tar] [file1] [file2] …
2.2 Bung
#tar -xvf [file.tar]
#tar -xvf [file.tar]
2.3 Nén và Gom
#tar -zcvf [file.tar.gz] file1 file2 …
#tar -zcvf [file.tar.gz] file1 file2 …
2.4 Giải nén và bung
#tar -zxvf [file.tar.gz]
#tar -zxvf [file.tar.gz]
3. Giải nén file có đuôi .bz2
#tar xjvf [file.tar.bz2]
#tar xjvf [file.tar.bz2]
Các định dạng khác :
1. ZIP
1.1 Nén một thư mục, sử dụng:
# zip -r folder.zip folder
1.2 Giải nén, sử dụng:
# unzip file.zip
# zip -r folder.zip folder
1.2 Giải nén, sử dụng:
# unzip file.zip
2. TAR.GZ
2.1 Nén một thư mục dạng .gz, sử dụng:
# tar -zcf folder.tar.gz folder
2.2 Giải nén, sử dụng:
# tar -zxvf file.tar.gz
# tar -zcf folder.tar.gz folder
2.2 Giải nén, sử dụng:
# tar -zxvf file.tar.gz
3. TAR.BZ2
3.1 Nén một thư mục dạng .bz2, sử dụng:
$ tar -jcf folder.tar.bz2 folder
3.2 Giải nén, sử dụng:
$ tar -jxvf file.tar.bz2
-Để biết thêm cách sử dụng lệnh man.
$ tar -jcf folder.tar.bz2 folder
3.2 Giải nén, sử dụng:
$ tar -jxvf file.tar.bz2
-Để biết thêm cách sử dụng lệnh man.
Thứ Ba, 30 tháng 7, 2019
Cách sử dụng Unix/Linux Shell trong C code
Ok anh em... Sau đây mình có một số example cách sử dụng Unix Shell trong code C...
1. echo and C
Để chạy program:
2. Lấy thời gian của lệnh ping
Solution:
Chú thích như sau:
Còn 1 số Shell khá hay:
- Hiện thời gian thực:
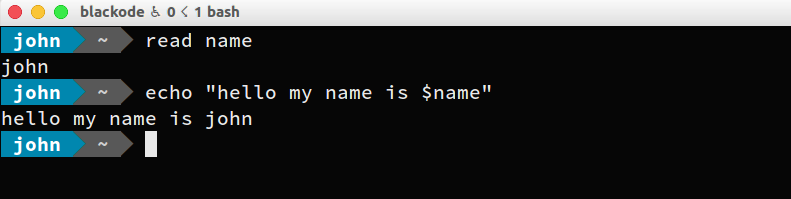
3. Đọc input từ Keyboard
Cái này giống như scanf() hay gets() trong C vậy...
Dữ liệu nhập vào sẽ được save trong biến $REPLY

read -p “ prompt_text”

4. Lưu dữ liệu trên Terminal
Để lưu lại các thao tác cũng như các dữ liệu hiển thị trên Terminal vào 1 File...
dùng: $script [file]
ví dụ:
gõ exit để thoát và lưu vào File output.txt
1. echo and C
#include <stdio.h>
#include <stdlib.h>

#define SHELLSCRIPT "\
#/bin/bash \n\
echo \"hello\" \n\
echo \"how are you\" \n\
echo \"today\" \n\
"

int main()
{
    puts("Will execute sh with the following script :");
    puts(SHELLSCRIPT);
    puts("Starting now:");
    system(SHELLSCRIPT);
    return 0;
}
Để chạy program:
$ cc cprog.c -o cprog
$ ./cprog
2. Lấy thời gian của lệnh ping
ping 192.168.1.1
PING 192.168.1.11 (192.168.1.11) 56(84) bytes of data.
64 bytes from 192.168.1.11: icmp_seq=1 ttl=64 time=0.028 ms
64 bytes from 192.168.1.11: icmp_seq=2 ttl=64 time=0.027 ms
64 bytes from 192.168.1.11: icmp_seq=3 ttl=64 time=0.024 ms
64 bytes from 192.168.1.11: icmp_seq=4 ttl=64 time=0.031 msSolution:
ping -c 4 -n google.com | cut -d '=' -s -f4 | cut -d ' ' -f1Chú thích như sau:
- For the
pingcommand:-c 4: Stop after sending 4 packets-n: Give numeric info only, not the associated names for the host address
- For the first
cutcommand:-d '=': Use the delimeter of the = sign-f4: Select the 4th field-s: Do not print lines not containing delimiters
- For the second
cutcommand:-d ' ': Use the delimeter of a space ' 'f1: Select the first field
Còn 1 số Shell khá hay:
- Hiện thời gian thực:
ping 192.168.1.1 | grep -Po 'time=\K\S+'ping 192.168.1.1 | perl -lne '/time=(\S+)/ && print $1'ping 192.168.1.1 | awk -F'[= ]' '/time=/{print $(NF-1)}'3. Đọc input từ Keyboard
Cái này giống như scanf() hay gets() trong C vậy...
Dữ liệu nhập vào sẽ được save trong biến $REPLY
read -p “ prompt_text”
4. Lưu dữ liệu trên Terminal
Để lưu lại các thao tác cũng như các dữ liệu hiển thị trên Terminal vào 1 File...
dùng: $script [file]
ví dụ:
$ script output.txt
Script started, file is output.txt

$ ls
output.txt  testfile.txt  foo.txt

$ exit
exit
Script done, file is output.txt
gõ exit để thoát và lưu vào File output.txt
Chủ Nhật, 28 tháng 7, 2019
Arduino và Module cảm biến bụi (Dust Sensor)
Ứng dụng
Do sự ô nhiễm môi trường không khí ngày càng trầm trọng. Nó trở thành một vấn đề được xã hội vô cùng quan tâm. Ô nhiễm môi trường ảnh hưởng trực tiếp tới sức khỏe mỗi con người. Vì vậy module cảm biến bụi sẽ giúp chúng ta biết được mức độ ô nhiễm môi trường không khí để có thể cải thiện chất lượng không khí.
- Máy lọc không khí.
- Điều hòa.
- Máy giám sát không khí.
.v.v..
Thông số cơ bản của module
- Độ nhạy: 0.5V / (100 mg / m3).
- Dải đo: 500μg / m3.
- Nguồn cung cấp: 2.5V ~ 5.5V.
- Dòng hoạt động: 20mA (tối đa).
- Nhiệt độ hoạt động: -10 ℃ ~ 65 ℃.
- Nhiệt độ bảo quản: -20 ℃ ~ 80 ℃.
- Thời gian sử dụng: 5 năm.
- Kích thước: 63.2mm × 41.3mm × 21.1mm.
- Kích thước lỗ khí: 9.0mm.
Sơ đồ kết nối chân

Sơ đồ kết nối
- Chân VCC: kết nối nguồn 2.5V ~ 5.5V.
- Chân GND: đất chung.
- Chân Aout : Analog output.
- Chân I led: Digital input.
Hoạt động
- Kích hoạt các diot hồng ngoại bằng cách thiết lập các pin LED ở mức HIGH.
- Chờ 0.28ms, sau đó bắt đầu để lấy mẫu điện áp từ pin Aout của module. Ghi chú rằng tín hiệu đầu ra sẽ mất 0.28ms để đạt trạng thái ổn định sau khi diot hồng ngoại được kích hoạt.

- Chu kì lấy mẫu là 0.004ms . Khi hoàn tất, thiết lập các pin LED LOW để vô hiệu hóa các diot hồng ngoại.
- Tính nồng độ bụi theo mối quan hệ giữa điện áp đầu ra và nồng độ bụi.

Bảng quan hệ giữa giá trị điện áp ra và nồng độ bụi.

Các tiêu chí chất lượng không khí.
Sensitivity (TYP) = 0.5V/(100ug/m3)... Đọc giá trị Analog trả về từ Sensor ta sẽ xác định được độ bụi không khí.
Ứng dụng minh họa: thiết bị đo và cảnh báo mức độ ô nhiễm trong văn phòng hiển thị thông số trên LCD.
Chuẩn bị phần cứng
Bạn có thể xem hình sau đây

- Các bạn tham khảo hình sau đây :

- Cắm dây USB 5V vào Arduino. Như vậy ta đã chuẩn bị xong phần cứng.
Phần lập trình , các bạn mở Arduino IDE lên và copy đoạn code dưới vào.
///////////////////////////////////////////////////////////////////////////////////////////////////////////////////////////////////////////////////////////////////////////////////////////////////////////////////
/****** HE THONG DO MUC O NHIEM CUA MOI TRUONG********
* **********************************************
*/
#include<LiquidCrystal.h> // thu vien LCD
LiquidCrystal lcd(8, 9, 4, 5, 6, 7); // cau hinh chan LCD
#define COV_RATIO 0.2 //ug/mmm / mv
#define NO_DUST_VOLTAGE 400 //mv
#define SYS_VOLTAGE 5000
/*
I/O
*/
const int iled = 2; //pin 2 ket noi voi led cua sensor
const int vout = 1; //analog input
/*
variable
*/
float density, voltage;
int adcvalue, level;
/*
ham loc
*/
int Filter(int m)
{
static int flag_first = 0, _buff[10], sum;
const int _buff_max = 10;
int i;
if(flag_first == 0)
{
flag_first = 1;
for(i = 0, sum = 0; i < _buff_max; i++)
{
_buff[i] = m;
sum += _buff[i];
}
return m;
}
else
{
sum -= _buff[0];
for(i = 0; i < (_buff_max - 1); i++)
{
_buff[i] = _buff[i + 1];
}
_buff[9] = m;
sum += _buff[9];
i = sum / 10.0;
return i;
}
}
int pollution_level (float x){ // tinh gia muc o nhiem
if (x <= 35) return 0;
if (x <= 75) return 1;
if (x <= 115) return 2;
if (x <= 150) return 3;
if (x <= 250) return 4;
return 5;
}
void setup(void)
{
pinMode(iled, OUTPUT); // cau hinh chan output
digitalWrite(iled, LOW); //tin hieu outout, o muc thap
lcd.begin(16,2); // khai bao LCD 16x2
Serial.begin(9600); //khai bao UART , baudrate 9600
Serial.print("*********************************** COGE Tech Corp ***********************************\n");
}
void loop(void)
{
/*
get adcvalue
*/
digitalWrite(iled, HIGH); // iled high
delayMicroseconds(280);
adcvalue = analogRead(vout); // doc gia tri adc
digitalWrite(iled, LOW); // iled low
adcvalue = Filter(adcvalue); // loc adc
/*
chuyen muc dien ap (mv)
*/
voltage = (SYS_VOLTAGE / 1024.0) * adcvalue * 11;
/*
chuyen tu dien ap sang do bui
*/
if(voltage >= NO_DUST_VOLTAGE)
{
voltage -= NO_DUST_VOLTAGE;
density = voltage * COV_RATIO;
}
else
density = 0;
Serial.print("The current dust concentration is: ");
Serial.print(density);
Serial.print(" ug/m3\n");
delay(1000);
level = pollution_level (density);
switch(level) { // hien thi do bui len lcd
case 0: { // muc trong sach
lcd.setCursor(0, 0);
lcd.print(" ");
lcd.setCursor(0, 0);
lcd.print("Trong sach");
break;
}
case 1:{ // muc trung binh
lcd.setCursor(0, 0);
lcd.print(" ");
lcd.setCursor(0, 0);
lcd.print("Muc trung binh");
break;
}
case 2:{ // muc o nhiem nhe
lcd.setCursor(0, 0);
lcd.print(" ");
lcd.setCursor(0, 0);
lcd.print("O nhiem nhe");
break;
}
case 3:{ // muc o nhiem vua
lcd.setCursor(0, 0);
lcd.print(" ");
lcd.setCursor(0, 0);
lcd.print("O nhiem Vua");
break;
}
case 4: { // muc o nhiem nang
lcd.setCursor(0, 0);
lcd.print(" ");
lcd.setCursor(0, 0);
lcd.print("O nhiem nang ");
break;
}
case 5: { // muc o nhiem vo cung nghiem trong
lcd.setCursor(0, 0);
lcd.print(" ");
lcd.setCursor(0, 0);
lcd.print("Nghiem trong");
break;
}
}
lcd.setCursor(0,1);
lcd.print(density);
lcd.setCursor(6,1);
lcd.print("(ug/m3)");
}
Đăng ký:
Nhận xét (Atom)